roundcube webmail 시스템에 계정을 추가하는 방법이다.

이메일 계정을 리눅스 시스템  계정을 사용하는 경우이다.


예시 도메인 : qrz.kr


news@qrz.kr 


이라는 이메일 주소를 새로 만들고자 한다.


1. 리눅스 시스템 계정 추가


# useradd news

# passwd news


2. roundcube webmail 로 접속해 본다.


정상적으로 접속이 된다.


3. 외부로 메일을 발송해 본다.


정상적으로 수신이 된다.


4. 외부에서 news@qrz.kr 로 메일을 발송해 본다.


수신이 안된다


5. 메일 로그를 확인해 본다.


# cat /var/log/maillog


May  2 12:47:08 localhost postfix/cleanup[15945]: 35CFD407A647: message-id=<bcf4ae2c4bf7217231a03a9a79754ada@cweb004.nm.nfra.io>

May  2 12:47:08 localhost postfix/qmgr[15938]: 35CFD407A647: from=<ellord@naver.com>, size=2365, nrcpt=1 (queue active)

May  2 12:47:08 localhost postfix/local[15946]: 35CFD407A647: to=<root@qrz.kr>, orig_to=<news@qrz.kr>, relay=local, delay=0.06, delays=0.04/0.01/0/0, dsn=2.0.0, status=sent (delivered to maildir)

May  2 12:47:08 localhost postfix/qmgr[15938]: 35CFD407A647: removed

May  2 12:47:08 localhost postfix/smtpd[15940]: disconnect from cvsmtppost024.nm.naver.com[125.209.239.212]

May  2 12:48:51 localhost postfix/postfix-script[15984]: refreshing the Postfix mail system

May  2 12:48:51 localhost postfix/master[15936]: reload -- version 2.10.1, configuration /etc/postfix

May  2 12:48:51 localhost postfix/anvil[15943]: statistics: max connection rate 1/60s for (smtp:125.209.239.212) at May  2 12:47:08

May  2 12:48:51 localhost postfix/anvil[15943]: statistics: max connection count 1 for (smtp:125.209.239.212) at May  2 12:47:08

May  2 12:48:51 localhost postfix/anvil[15943]: statistics: max cache size 1 at May  2 12:47:08

May  2 12:49:28 localhost postfix/smtpd[16020]: connect from cvsmtppost014.nm.naver.com[125.209.239.207]

May  2 12:49:28 localhost postfix/smtpd[16020]: 337A7407A647: client=cvsmtppost014.nm.naver.com[125.209.239.207]

May  2 12:49:28 localhost postfix/cleanup[16025]: 337A7407A647: message-id=<238ec4d11f7c5dc648f7ba359adb7@cweb014.nm.nfra.io>

May  2 12:49:28 localhost postfix/qmgr[15989]: 337A7407A647: from=<ellord@naver.com>, size=2360, nrcpt=1 (queue active)

May  2 12:49:28 localhost postfix/local[16026]: 337A7407A647: to=<root@qrz.kr>, orig_to=<news@qrz.kr>, relay=local, delay=0.06, delays=0.05/0.01/0/0, dsn=2.0.0, status=sent (delivered to maildir)

May  2 12:49:28 localhost postfix/qmgr[15989]: 337A7407A647: removed

May  2 12:49:28 localhost postfix/smtpd[16020]: disconnect from cvsmtppost014.nm.naver.com[125.209.239.207]


수신자가 root@qrz.kr 로 되어 있다.


리눅스 root 디렉토리로 가 보니 새 메일함에 들어와 있다.

[root@localhost new]# pwd

/root/Maildir/new

[root@localhost new]# ll

합계 64

-rw-------. 1 root root 3203  5월  2 09:31 1651451464.Vfd00I14fb6cM406777.localhost.localdomain
-rw-------. 1 root root 2417  5월  2 09:31 1651451519.Vfd00I14fb6eM891048.localhost.localdomain
-rw-------. 1 root root 3181  5월  2 09:37 1651451842.Vfd00I14fb6dM615415.localhost.localdomain
-rw-------. 1 root root 3156  5월  2 09:40 1651452023.Vfd00I14fb6fM544205.localhost.localdomain
-rw-------. 1 root root 2404  5월  2 09:42 1651452153.Vfd00I14fb70M8611.localhost.localdomain
-rw-------. 1 root root 2519  5월  2 09:42 1651452177.Vfd00I14fb71M71661.localhost.localdomain


6. /etc/aliases 를 확인해 본다.


예를 들어 아래에 나열된  계정의 이메일과 동일한 계정을 생성할 경우 root에게로 보내어지므로 수신이 안되는 것처럼 보인다.


bin:            root

daemon:         root

adm:            root

lp:             root

sync:           root

shutdown:       root

halt:           root

mail:           root

news:           root

uucp:           root

operator:       root

games:          root

gopher:         root

ftp:            root

nobody:         root

radiusd:        root

nut:            root

dbus:           root

vcsa:           root

canna:          root

wnn:            root

rpm:            root

nscd:           root

pcap:           root

apache:         root

webalizer:      root

dovecot:        root

fax:            root

quagga:         root

radvd:          root

pvm:            root

amandabackup:           root

privoxy:        root

ident:          root

named:          root

xfs:            root

gdm:            root

mailnull:       root

postgres:       root


news가 포함되어 있다.


news에게로 오는 모든 이메일은 root에게로 전달되고 있었다.


#news와 같이 주석을 처리하거나 news항목을 삭제하고 저장한다.


aliases를 재인식 시킨다.


[root@localhost new]# postalias /etc/aliases


외부에서 메일을 다시 news@qrz.kr로 보내본다.


May  2 12:50:55 localhost postfix/smtpd[16071]: 89182407A647: client=cvsmtppost027.nm.naver.com[125.209.224.214]

May  2 12:50:55 localhost postfix/cleanup[16025]: 89182407A647: message-id=<7eecd3d162e4758a5734f66360920d9@cweb006.nm.nfra.io>

May  2 12:50:55 localhost postfix/qmgr[15989]: 89182407A647: from=<ellord@naver.com>, size=2388, nrcpt=1 (queue active)

May  2 12:50:55 localhost postfix/local[16026]: table hash:/etc/aliases(0,lock|no_regsub|no_proxy|no_unauth|fold_fix) has changed -- restarting

May  2 12:50:55 localhost postfix/local[16072]: 89182407A647: to=<news@qrz.kr>, relay=local, delay=0.05, delays=0.03/0.01/0/0, dsn=2.0.0, status=sent (delivered to maildir)

May  2 12:50:55 localhost postfix/qmgr[15989]: 89182407A647: removed

May  2 12:50:55 localhost postfix/smtpd[16071]: disconnect from cvsmtppost027.nm.naver.com[125.209.224.214]

May  2 12:54:15 localhost postfix/anvil[16023]: statistics: max connection rate 1/60s for (smtp:125.209.239.207) at May  2 12:49:28

May  2 12:54:15 localhost postfix/anvil[16023]: statistics: max connection count 1 for (smtp:125.209.239.207) at May  2 12:49:28

May  2 12:54:15 localhost postfix/anvil[16023]: statistics: max cache size 1 at May  2 12:49:28


to=<root@qrz.kr> 이 빠져있고  to=<news@qrz.kr> 로 되어 있다.


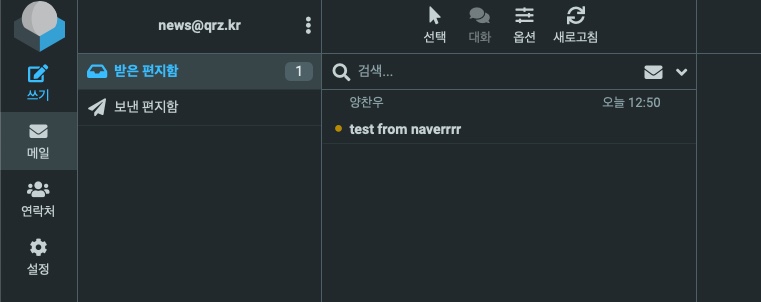
roundcube 웹메일에 접속해 본다.


정상적으로 수신이 된다.


블로그 이미지

엘로드넷

,

OSX php7.4 설치

PHP 2022. 4. 21. 15:07

1. 설치


$ brew upgrade php@7.4


==> Downloading https://www.freetds.org/files/stable/freetds-1.3.10.tar.gz
Error: php@7.4: Failed to download resource "freetds"
Download failed: Homebrew-installed `curl` is not installed for: https://www.freetds.org/files/stable/freetds-1.3.10.tar.gz
Chan-ui-Mac-mini:httpd ds1ttc$ brew install curl
Running `brew update --preinstall`...
==> Auto-updated Homebrew!
Updated 1 tap (homebrew/core).
==> Updated Formulae
Updated 1 formula.

Warning: You are using macOS 10

curl 이 설치 안되어 있어서 freetds 가 설치가 안된다.


curl 을 설치


$ brew install curl


다시 php 설치


$ brew upgrade php@7.4


설치 후 php restart


$ brew services restart php@7.4


버전 확인


Chan-ui-Mac-mini:httpd ds1ttc$ php -v
PHP 7.1.33 (cli) (built: Jan 18 2020 13:49:07) ( NTS )
Copyright (c) 1997-2018 The PHP Group
Zend Engine v3.1.0, Copyright (c) 1998-2018 Zend Technologies
Chan-ui-Mac-mini:httpd ds1ttc$

여전히 예전 버전이 나옴.


.profile 에 등록해 주자.


$ echo 'export PATH="/usr/local/opt/php@7.4/bin:$PATH"' >> ~/.profile
$ echo 'export PATH="/usr/local/opt/php@7.4/sbin:$PATH"' >> ~/.profile

$ source .profile


다시 버전 확인


Chan-ui-Mac-mini:~ ds1ttc$ php -v
PHP 7.4.29 (cli) (built: Apr 21 2022 07:59:48) ( NTS )
Copyright (c) The PHP Group
Zend Engine v3.4.0, Copyright (c) Zend Technologies
    with Zend OPcache v7.4.29, Copyright (c), by Zend Technologies
Chan-ui-Mac-mini:~ ds1ttc$


그래도 예전 버전이 나온다면 

터미널을 새로 열어서 해 볼 것.


블로그 이미지

엘로드넷

,

OSX mariadb 설치

Mac 2022. 4. 21. 15:03


1. 설치

$ brew install mariadb


2. 서비스시작

$ brew services start mariadb


3. root비전 설정

$ sudo mariadb-secure-installation


Chan-ui-Mac-mini:www ds1ttc$ sudo mariadb-secure-installation
Password:


NOTE: RUNNING ALL PARTS OF THIS SCRIPT IS RECOMMENDED FOR ALL MariaDB
      SERVERS IN PRODUCTION USE!  PLEASE READ EACH STEP CAREFULLY!

In order to log into MariaDB to secure it, we'll need the current
password for the root user. If you've just installed MariaDB, and
haven't set the root password yet, you should just press enter here.

Enter current password for root (enter for none): 
OK, successfully used password, moving on...

Setting the root password or using the unix_socket ensures that nobody
can log into the MariaDB root user without the proper authorisation.

You already have your root account protected, so you can safely answer 'n'.

Switch to unix_socket authentication [Y/n] n  
 ... skipping.

You already have your root account protected, so you can safely answer 'n'.

Change the root password? [Y/n] y
New password: 
Re-enter new password: 
Password updated successfully!
Reloading privilege tables..
 ... Success!


By default, a MariaDB installation has an anonymous user, allowing anyone
to log into MariaDB without having to have a user account created for
them.  This is intended only for testing, and to make the installation
go a bit smoother.  You should remove them before moving into a
production environment.

Remove anonymous users? [Y/n] y
 ... Success!

Normally, root should only be allowed to connect from 'localhost'.  This
ensures that someone cannot guess at the root password from the network.

Disallow root login remotely? [Y/n] y
 ... Success!

By default, MariaDB comes with a database named 'test' that anyone can
access.  This is also intended only for testing, and should be removed
before moving into a production environment.

Remove test database and access to it? [Y/n] y
 - Dropping test database...
 ... Success!
 - Removing privileges on test database...
 ... Success!

Reloading the privilege tables will ensure that all changes made so far
will take effect immediately.

Reload privilege tables now? [Y/n] y
 ... Success!

Cleaning up...

All done!  If you've completed all of the above steps, your MariaDB
installation should now be secure.

Thanks for using MariaDB!
Chan-ui-Mac-mini:www ds1ttc$


4. mariadb 서버에 접속해 보자

$ mysql -u root -p mysql

Chan-ui-Mac-mini:www ds1ttc$ mysql -u root -p mysql
Enter password: 
Reading table information for completion of table and column names
You can turn off this feature to get a quicker startup with -A

Welcome to the MariaDB monitor.  Commands end with ; or \g.
Your MariaDB connection id is 11
Server version: 10.7.3-MariaDB Homebrew

Copyright (c) 2000, 2018, Oracle, MariaDB Corporation Ab and others.

Type 'help;' or '\h' for help. Type '\c' to clear the current input statement.

MariaDB [mysql]> show databases;
+--------------------+
| Database           |
+--------------------+
| information_schema |
| mysql              |
| performance_schema |
| sys                |
+--------------------+
4 rows in set (0.001 sec)

MariaDB [mysql]>

최신 버전이 잘 설치되었다.


'Mac' 카테고리의 다른 글

OSX Mojave freetype install error  (0) 2023.03.18
Change OSX ssh port 맥OS ssh 포트 변경  (0) 2022.11.04
osx apache httpd는 어디에 설치?  (0) 2022.04.21
osx 원격제어설정  (0) 2022.04.15
OSX ssh 포트 변경  (0) 2022.04.14
블로그 이미지

엘로드넷

,